How to Set Time Limits for a Regular Account in Windows 10?
- Jul 22, 2019
You can control when a user is allowed to log in Windows 10 and when he/she is not allowed to log in. That is the Parental controls I’m talking about.
The features are very solid, but to use them you need to set the whole family up with Microsoft accounts and create specific child accounts for you kids, who you might be attempting to set limits for. If you prefer to use regular local accounts, you can still set time limits for how long any non-administrative user can use the system.
How to Set Time Limits?
By starting from Command Prompt. To open Command Prompt, right-click the Start button (or press and hold Windows + X), select “Command Prompt (Admin)”, and click “Yes” to run it with administrative rights.

This is the command you need:
net user <username> /time:<day>,<time>
1. Replace with the name of the account you want to limit.
2. Replace with the day you want to set limits on (Spell out the full names or user the initials: Su, M, T, W, Th, F, Sa).
3. Replace
Here are examples:
net user simon /time:Sa,8am-4pm
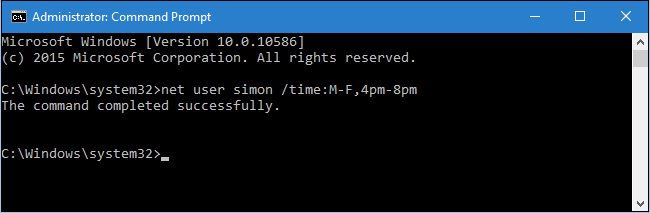
net user simon /time:M-F,4pm-8pm

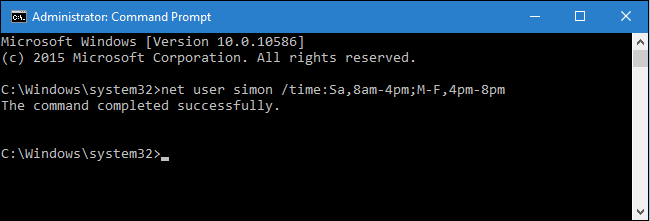
You can also string multiple day/time limits together by separating them with a semicolon:
net user simon /time:Sa,8am-4pm;M-F,4pm-8pm
Then, what if you want to undo all the limits?
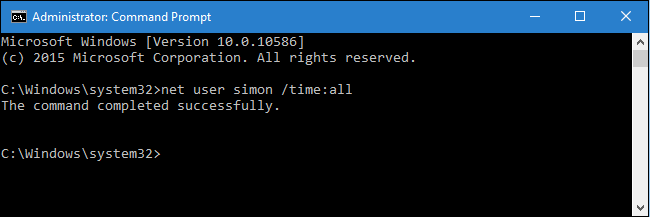
How to Remove Restrictions from a User?
Here is the command you need:
net user simon /time:all
At last I shall mention that if you use the command but enter nothing after the “time:” (leaving it blank), the user will never be able to log on. That might come in handy when you want to lock out an account temporarily, but pay attention not to leave it blank by accident. BTW, if you ever need to see what times you have set for a user, just time the “net user” command followed by the account name:
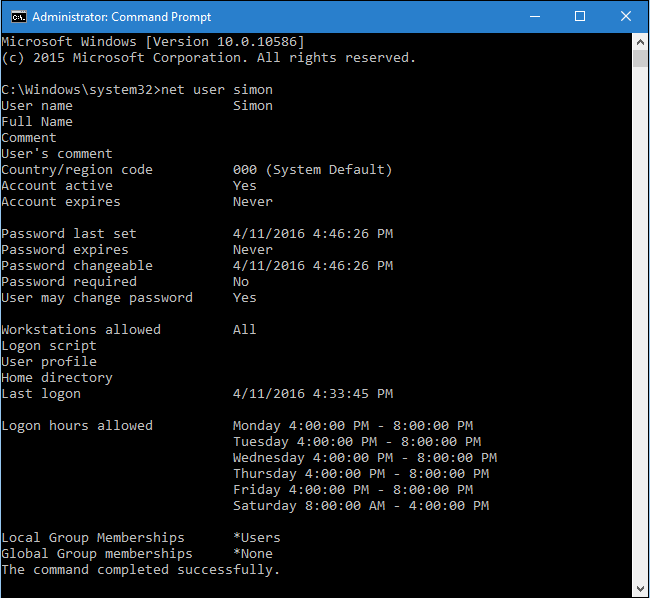
net user simon
And here is what you will see (example):
Popular Posts
- What Kind of Programs do You Think are Necessary in Windows 10?
- What’s SpyHunter and How to Fix the File Being Quarantined
- How to Forcibly Remove a Program That Won’t Uninstall in Windows
- 3 Tips to Remove a Program that Won’t Uninstall
- How To Uninstall Applications On Windows 10 – Program Removal Guides
- Tutorial: How to Remove & Uninstall Programs / Applications on Windows 7
Comments
You must be logged in to post a comment.