How to Rearrange, Remove or Add Icons in Mac’s Menu Bar
- May 15, 2019
![]()
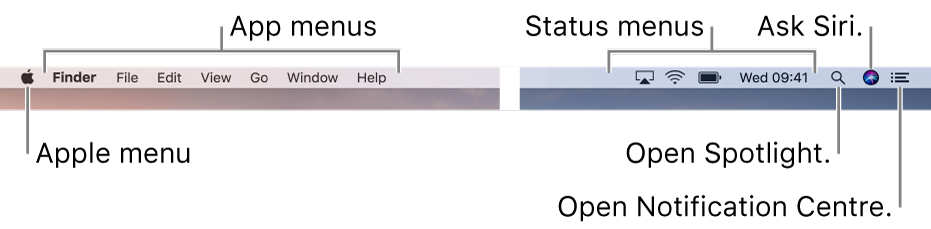
Question 1. What components reside in the menu bar on your Mac?
In macOS, the menu bar on the top of the screen allows you to quickly access system and application functions, perform tasks and check status using the menus and icons.
Besides, you can enable the option in the General preferences to hide the menu bar so that it will only show up when you move the pointer to the top of the screen.
Typically, the menu bar offers shortcuts to the Apple menu, app menus, status menu, Spotlight, Siri and Notification Center. You can edit the menu bar to rearrange, add or remove icons to suit your needs, and that is easy to do if you read through this post.
Question 2. How to rearrange, add or remove icons in the menu bar?
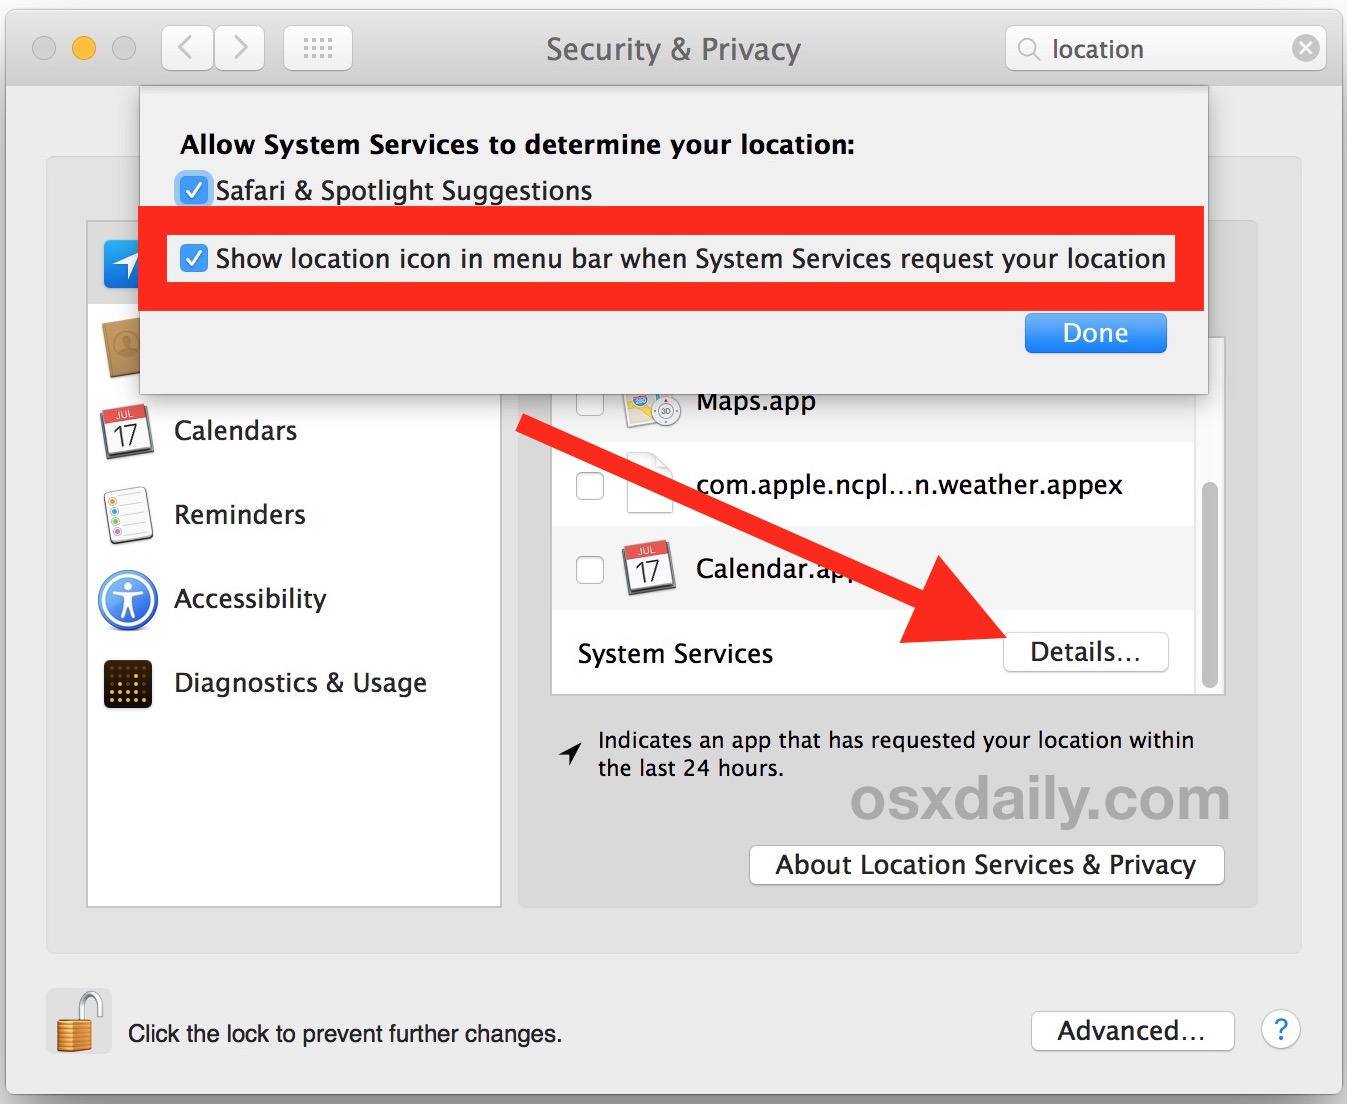
To rearrange the icons in your menu bar, you just need to do the followings:
- Hold down Command key, and move your cursor over the icon you want to move
- Click and hold the icon by pressing the left mouse button
- Drag the icon into your preferred position on the menu bar
- Let go of the left mouse button, and the icon will reside there
![]()
To remove icons associated with system controls, still hold down the Command key, then drag the icon out of the menu bar and onto the desktop. Once you let go of the left mouse button, the icon should vanish from the menu bar with a ‘whoosh’ sound.
The icon does not disappear from menu bar? Well, the icon is likely linked to a third party app or placed by another user. In that case you can go to look for an option in the associated applications settings (such as Show In Menu Bar) and uncheck it.
If you previously removed a system icon from the menu bar and would like to make it reappear, you can find the options in the associated preference pane. For example, to reinstate the Language icon, select Language & Region in the preference pane, select Input Sources, and then check the box next to Show Input Menu In Menu Bar.
To add other system icons (like Clock that cannot be found in System Preferences) to the menu bar, you will need to go deeper to the System folder. Here’s how to do:
- Open Finder, click the Go menu in the menu bar, and choose Go to Folder
- Type the path in the box and click Enter to open up the folder:
/System/Library/CoreServices/Menu Extras - Double click an item in the folder and it will appear in your menu bar
So, that’s how to rearrange, remove, and add icons in your menu bar. Any question?
Popular Posts
- What Kind of Programs do You Think are Necessary in Windows 10?
- What’s SpyHunter and How to Fix the File Being Quarantined
- How to Forcibly Remove a Program That Won’t Uninstall in Windows
- 3 Tips to Remove a Program that Won’t Uninstall
- How To Uninstall Applications On Windows 10 – Program Removal Guides
- Tutorial: How to Remove & Uninstall Programs / Applications on Windows 7
Comments
You must be logged in to post a comment.