How to Delete Locked Files from Your Mac – Safe Cleaning Job
- Feb 15, 2019
Why lock a file? It makes the file unchangeable. The feature of locking files is to control who can access or edit a file. Deleting a locked file on a Mac can be quite troublesome, despite the fact that it is great for security. Fortunately, you can deal with files that resist removal through a few possible workarounds.
The process of deleting locked files can be a burden, but it is pretty simple actually, and this is what we’re going to guide you through today.
Method 1: Use Secure Empty Trash
1.1 Be note that there is difference between trash and “secure” trash. The latter is to make sure sensitive files have their indexing removed from the hard drive and the space they occupied overwritten. But the Secure Empty Trash option has been removed in OSX 10.11+.
1.2 Drag the file you want to remove into the trash.
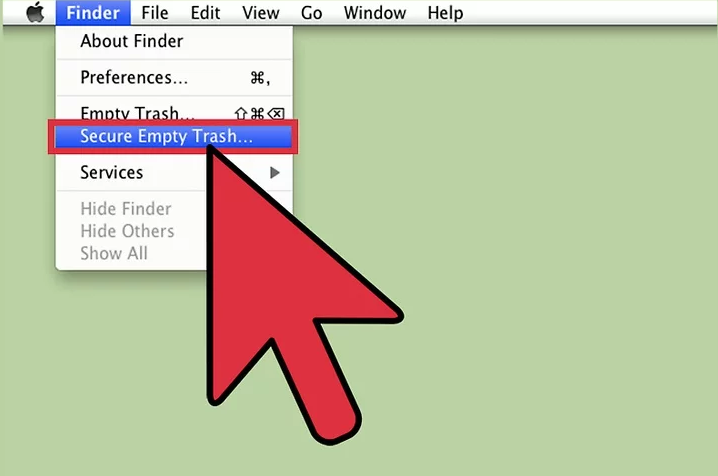
1.3 Open the trash in the finder, select File > Secure Empty Trash.
Method 2: Alter File Permissions
2.1 Select the file you want to delete, go to File > Get Info. There will be a checkbox labeled “Locked” telling you the file’s current status. If the box is greyed out, then you don’t have the permission for it. If it isn’t greyed out, just uncheck it and delete the file again.
2.2 Press and Hold the Option key and go to File > Show Inspector. In this menu, press the triangle next to Ownership and Permissions to expand.
2.3 Press the lock icon (This will require administrator password)
2.4 Press You Can, select Read and Write, deselect the checkbox, and delete the file like normal.

Method 3: Use the Terminal
3.1 Go to Applications > Utilities > Terminal.
3.2 Enter “sudu chflags nouchg [path to the file]”. (You can drag and drop the target file in the terminal to automatically enter the file path.

Anything you would like to ask? Let us know by leaving comments below.
Popular Posts
- What Kind of Programs do You Think are Necessary in Windows 10?
- What’s SpyHunter and How to Fix the File Being Quarantined
- How to Forcibly Remove a Program That Won’t Uninstall in Windows
- 3 Tips to Remove a Program that Won’t Uninstall
- How To Uninstall Applications On Windows 10 – Program Removal Guides
- Tutorial: How to Remove & Uninstall Programs / Applications on Windows 7
Comments
You must be logged in to post a comment.