How to Defragment Hard Drive in Windows 10 – Easy Tutorials
- May 17, 2019
After a long-term use of your computer, files on the hard drive get fragmented. And your computer may slow down because it has to check multiple places on the drive for those pieces. To boost its performance, you may use the built-in tool in Windows to defragment the said files.
How and when should you do it?
In fact, the latest several versions of Windows automatically defragment files on a schedule. They do it once a week by default, but they do not always run consistently. So if you notice files are taking longer to load than before, or you simply want to double-check termly, follow our instructions to get it done.
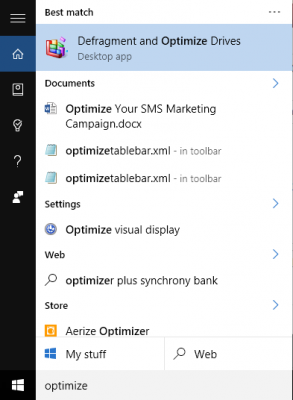
1. Access the disk optimization tool.
Type “optimize” or “defrag” in the search box of the taskbar.
2. Select the hard drive you want to defragment and click Analyze.
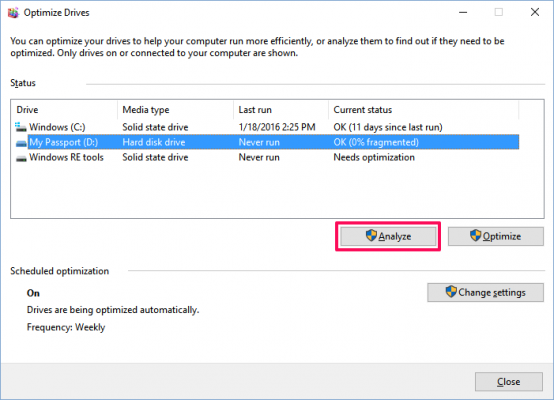
Please note that if it is a SSD, this option is grayed out and not available.
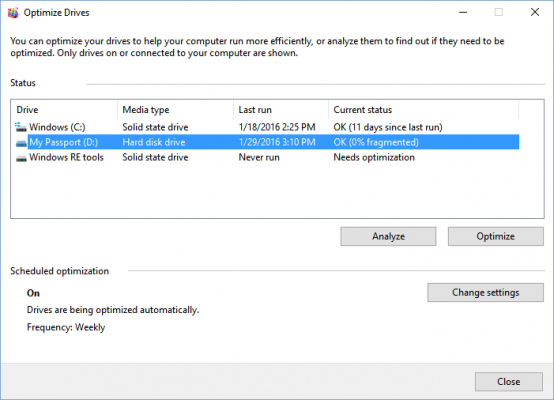
3. Check the percentage of fragmented files.
Keeping the fragmentation percentage under 5% or so is suggested, so that the process does not take too long to complete.
4. To defragment the drive, click Optimize.
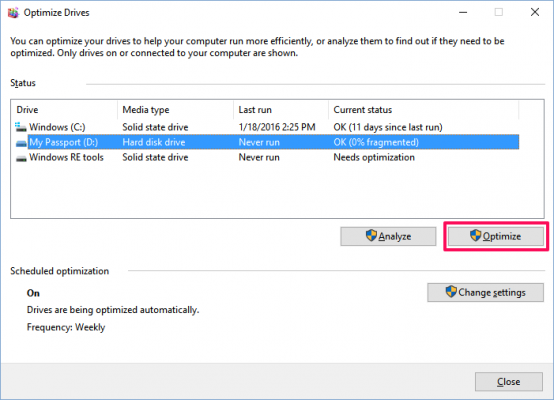
You’re suggested doing this when you don’t need to use the computer for anything else, so it can go efficiently. When it is done, the drive should say 0% fragmented in the Optimize Drives utility.
- Something about SSDs (Solid State Drives)
The mechanism of SSDs is different from traditional hard drives. Quite a number of users think that SSDs do not need to be defragmented, and doing so can also consume their lifespans. But the truth is that Windows defragments SSDs once a month if necessary and if you enable the System Restore. There is no need to worry about that, since the automatic defragmentation extends the drive’s lifespan.
Is this guidance helpful to you? For anything you think we missed or you want to add, leave comments below to let us know.
Popular Posts
- What Kind of Programs do You Think are Necessary in Windows 10?
- What’s SpyHunter and How to Fix the File Being Quarantined
- How to Forcibly Remove a Program That Won’t Uninstall in Windows
- 3 Tips to Remove a Program that Won’t Uninstall
- How To Uninstall Applications On Windows 10 – Program Removal Guides
- Tutorial: How to Remove & Uninstall Programs / Applications on Windows 7
Comments
You must be logged in to post a comment.