How to Change Sleep Settings on Windows 10?
- Nov 18, 2019
In Windows 10, the sleep mode, which is also a low-power state available for setting, comes in handy, especially when you are using a notebook or tablet and wanting to extend its battery life.
By default, when your device is on batter, your Windows 10 will activate the sleep mode if you haven’t done anything with it for 5 minutes. When your device is on AC power, the same thing will happen in 10 minutes. Defined in the power plan active currently, this default setting let the operating system go into sleep, drawing a very small amount power. Still, you can resume your work quickly by pressing any key, or move the mouse or touchpad.
If you think the sleep mode is not quite useful in your cases, you may either change the settings to let your PC go into sleep after a longer period, or make your PC never sleep.
Steps to Disable/Change/Enable Sleep Mode
Method 1:
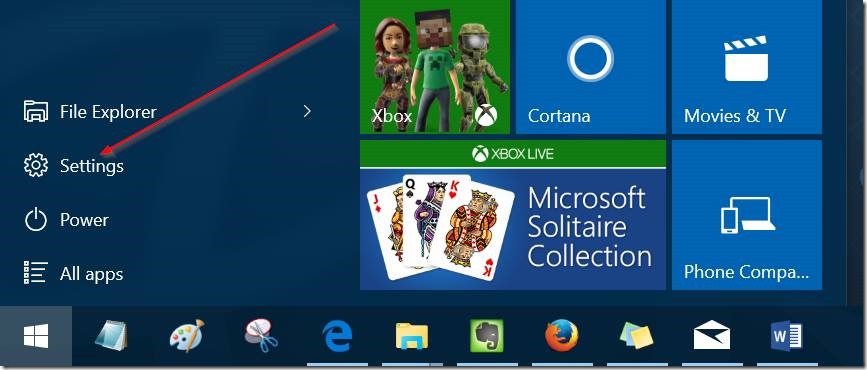
1. Click the Start button in the lower left corner, and select Settings.
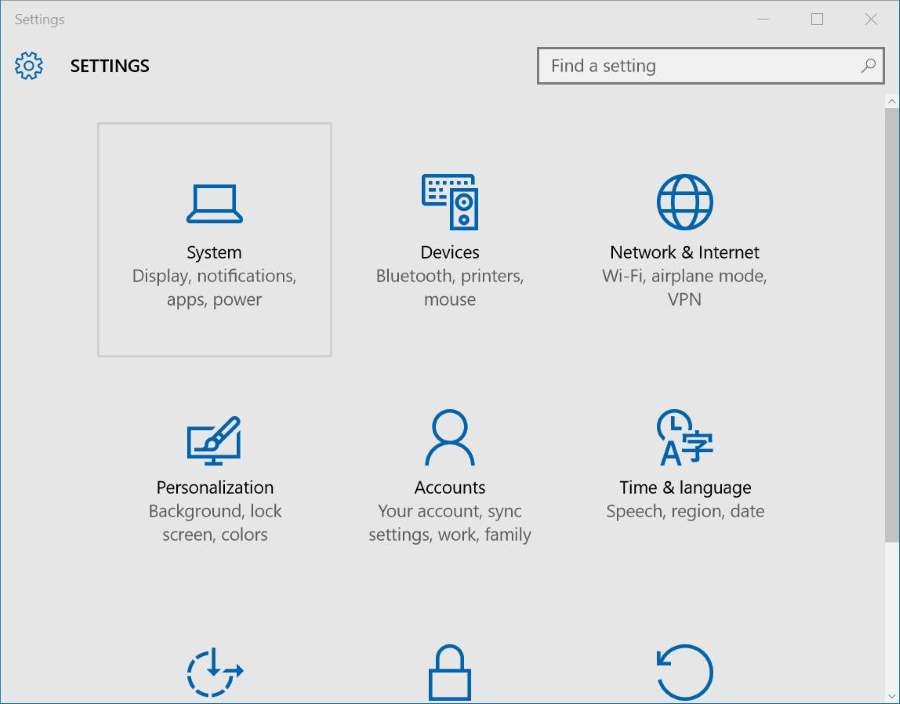
2. Click the first option: System.
3. On the next page, click Power & Sleep.
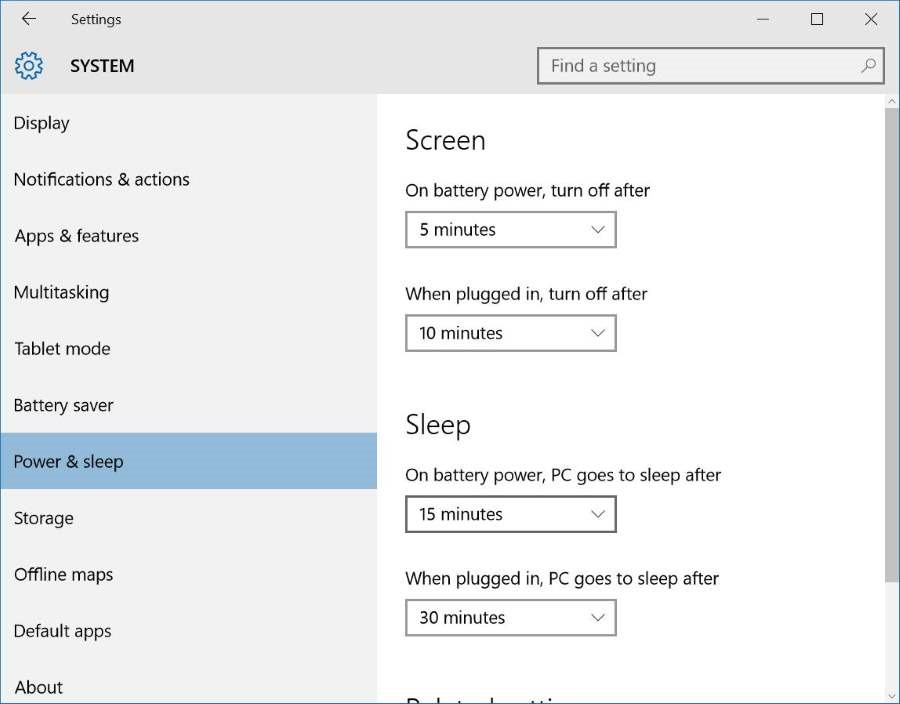
4. You will see two options under the Sleep section:
> On battery power, PC goes to sleep after
> When plugged in, PC goes to sleep after
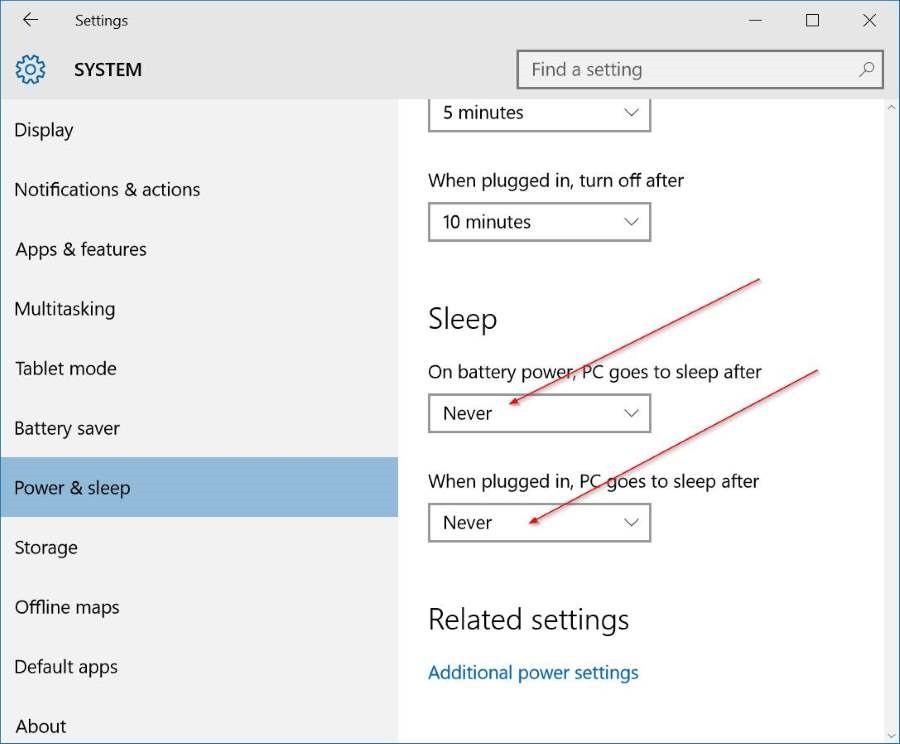
For both option, you can expand the dropt-down menu and choose Never, so that your PC will never activate sleep mode again. You can also configure how long Windows 10 should wait before putting your PC to sleep.
Method 2:
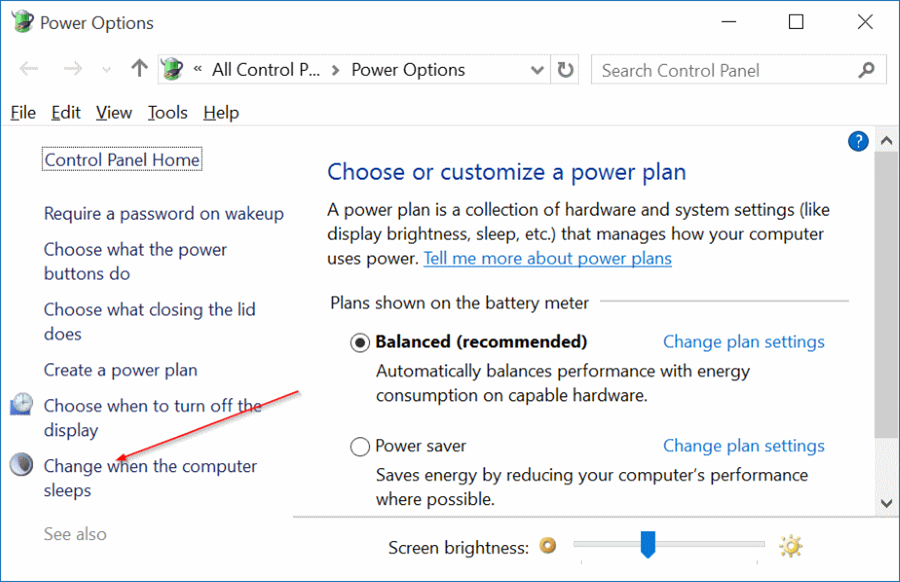
1. Type “Power Options” in the taskbar search box, and select Power Options in the result.

2. In the window that pops up, select Change when the computer sleeps on the left-pane.
3. In the Edit Plan Settings window, select Never or any other number for On battery and plugged in, then click Save changes button.
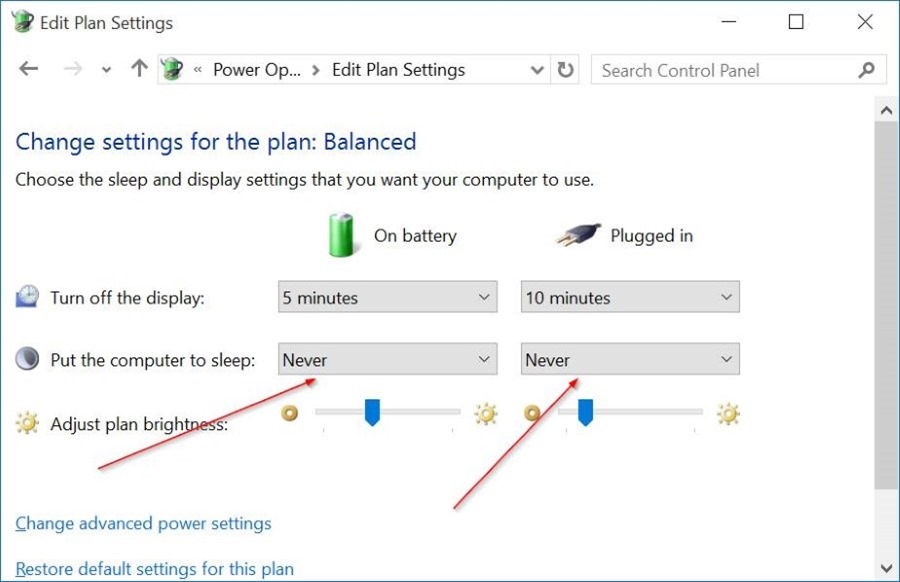
Please note that if you have disabled sleep mode for Power Saver plan, you will need to go through the same steps for Balanced and other plans (if created) to prevent the system putting your PC into the sleep mode.
Popular Posts
- What Kind of Programs do You Think are Necessary in Windows 10?
- What’s SpyHunter and How to Fix the File Being Quarantined
- How to Forcibly Remove a Program That Won’t Uninstall in Windows
- 3 Tips to Remove a Program that Won’t Uninstall
- How To Uninstall Applications On Windows 10 – Program Removal Guides
- Tutorial: How to Remove & Uninstall Programs / Applications on Windows 7
Comments
You must be logged in to post a comment.