How to Print a Screenshot on a Mac, Capture MacBook’s Screen?
- Jul 09, 2020
Did you know there are five different ways to capture screen shots on a Mac? Sometimes you use a Mac screenshot, then how do you take a screenshot? MacOS makes it easier to take screenshots on a Mac. As a result, you can get five types of screen captures on a Mac, and we provide detailed sections for each screen capture.
Method 1. How Do I Take Screenshots of The Entire Desktop on a Mac
By this method, you can capture the entire desktop no matter what the current desktop is. In general, you can use it to capture video frames, game scores, etc. Refer to the steps as:
Step 1: Get everything you need ready. Basically, you must open all the programs you want to capture, and when you’re done, your screen should look exactly like the screenshots you want.
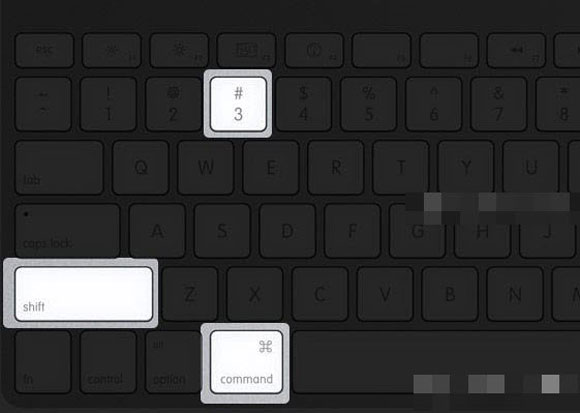
Step 2: Press Command + Shift + 3 on the keyboard.
Step 3: Next, you’ll see the new screenshot file with PNG extension on your Mac desktop, this is the screenshot you just took.
Step 4: You can double click the screenshot file to have a preview.
Method 2. How Do I Take Screenshot of a Particular Area of Desktop on a Mac
If you only want to print a specific area of the screen. You can use this method to capture parts of the chat, images on the network, or any other images you.
Step 1: Set up the screen, and make sure you know what to capture.
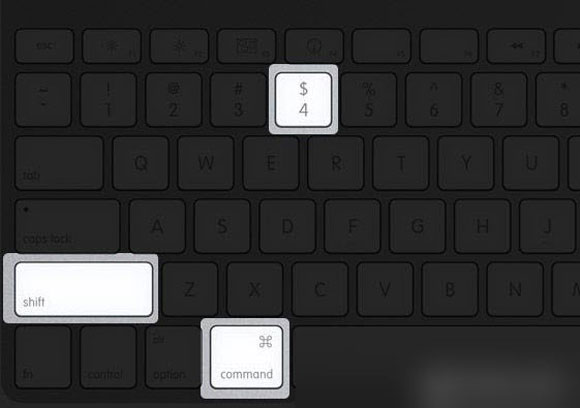
Step 2: On the keyboard, press Command + Shift + 4 keys.
Step 3: After releasing the keys, the mouse cursor will change to a movable cross-hair.
Step 4. Now drag the cursor anywhere (this will be an Angle of the screen capture), then drag the mouse and drag it over the area for which you want to take a screenshot.
Step 5: When finished, you can release the mouse button to get the screen capture as a.PNG file.
Method 3. How Do I Take Screen Shots of a Single Window on a Mac
There are several open Windows on your Mac screen, so you can’t capture the entire screen or even try to capture specific areas. Then why not cut a window?
Step 1: To pint a window, you should make sure you have the correct window opened at first.
Step 2: Now press and release Command + Shift + 4 on the keyboard.
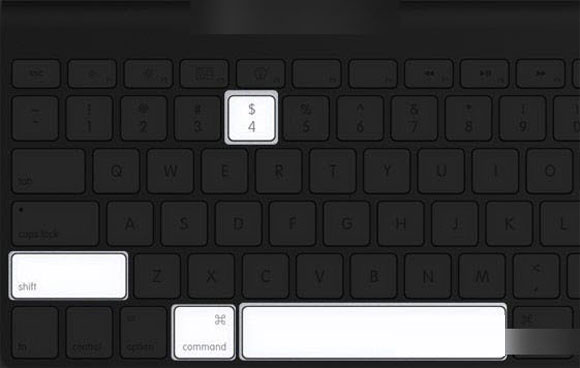
Step 3: Press the Space key.
Step 4: Now, click the window you want to capture. You can even select something else by moving the mouse.
Step 5: When finished, you will have the correct .PNG file on your desktop.
Method 4. How Do I Take Screen Shots of Menus on a Mac
Step 1: First, click the menu to display the content that you want to capture. Press Shift + Command + 4 key and the pointer will now change to a cross-hair.
Step 2: Now drag to select the menu, then release the mouse or touch pad button.
Note: To cancel, press the Escape (Esc) key before releasing the button.
Step 3: You will find the screenshot file as a .PNG file on your desktop.
Method 5. How Do I Take Screenshots of The Touch Bar on a MacBook Pro
Make sure the your MacBook Pro runs macOS Sierra 10.12.2 or later. You just need to press shift + command + 6 key to capture screen.
You can also customize the Control Bar area of the touch bar including the Screen Capture button. You can then simply need to click the Screen capture button to view the screen capture type and options for where to save it.
Discover more Mac tricks here:
- Automator for macOS – How to Batch Rename Photos With Mac Automator
- What are New Features Coming with macOS Big Sur?
- How to Use Target Disk Mode to Transfer and Move Files Between Two Mac Computers?
- How to Install Your Mac OS Fonts?
- How to Fix “The App” Will Damage Your Computer, You Should Eject the Disk Image?
At Last
So you want to print a screenshot in Mac OS X… but don’t know how to do it. Learn how to take screenshot on your Mac computers and feel empowered, creative and inspired here. At the end of this post, you will acquire how to do it and make you feel empowered and calm as you print a screenshot on your Mac.
Popular Posts
- What Kind of Programs do You Think are Necessary in Windows 10?
- What’s SpyHunter and How to Fix the File Being Quarantined
- How to Forcibly Remove a Program That Won’t Uninstall in Windows
- 3 Tips to Remove a Program that Won’t Uninstall
- How To Uninstall Applications On Windows 10 – Program Removal Guides
- Tutorial: How to Remove & Uninstall Programs / Applications on Windows 7